The Art of the Walk Cycle
by Jerry Slayton
Animate objects, such as you and I, live in constant motion. We use our skeleton in concert with our muscles to perform a wide variety of large and small movements. Animals, plants, even water, share this animate quality. So why do we create artworks that sit still?
Stop-motion animation developed alongside photography in the late 1800s. It is a filmmaking style in which objects are physically moved in small increments and then photographed after each movement. The wonder of animation is that any object, from a still drawing to a block of wood, can be brought to life through this process. Cut paper, fabric puppets, and clay models are commonly used in animated films to tell fiction and non-fiction stories.
To develop their characters, many animators create walk cycles, or walking loop animation. A walk cycle allows the animator to explore the personality of a subject through movement. In today’s blog post we will breakdown the basic steps in creating a Walk Cycle and give you the tools to make your own.
Step 1- Choosing a Subject
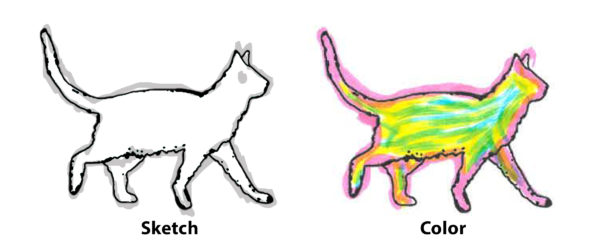
To begin the process of making a walk cycle, we must first choose a subject. For today’s example, I have chosen a cat. We start by sketching the cat with a pencil, then add dark outlines and color.
Step 2- Planning the Movements
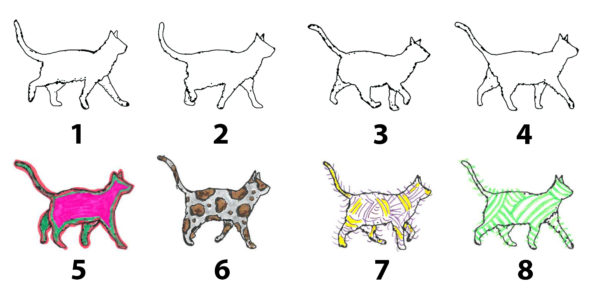
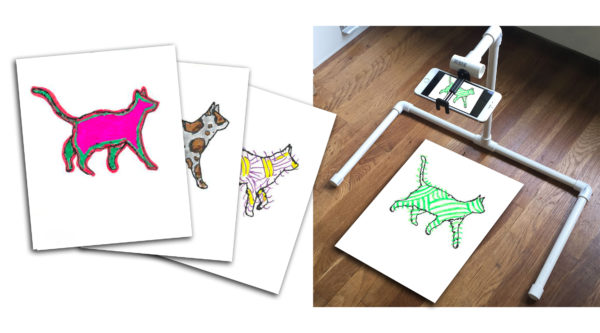
To create the illusion of movement, we will need to draw the cat in a variety of walking poses. It helps to start by sketching the basic stick figure of the cat and then add the contour lines of the body. In the photo below I have drawn each cat on a separate sheet of paper. Regular 20lb copy paper works great because it is slightly transparent, allowing you to see through and trace. For this animation we draw 8 separate pictures of the cat walking. We’ll finish each cat by adding dark outlines and color.
Step 3- Recording the Animation
Next, each picture in the sequence must be photographed. I like to write the order number on the back of each drawing to help me remember the sequence. It’s important to keep your camera absolutely still while photographing the drawings, I recommend using a tripod or mounting your camera or device to a solid piece of furniture.
Step 4- Editing
Once the drawings have been photographed you can organize them in an editing software to play the walk cycle.There are many methods for recording and editing available to animators today. For this animation, I’m using an application called iMotion. It’s a free download in the Apple Store and I will attach a video link below that goes into more detail.
Now that you have a basic understanding of the walk cycle and stop-motion animation, your still drawings can come to life. I encourage anyone interested to explore other materials, such as clay, cut paper, even household objects to create new and exciting works of moving art!
That’s a nice idea ! I bookmark it.